Most Improvement Districts don’t have a solid way to really quantify what they do on a day to day basis.
It’s true and I understand it. It’s challenging to explain the plethora of random calls or requests you can get in a single day. One day you can be getting 5 calls for abandoned vehicles, the next day you can get 10 phone calls about transients in this district, and then the day after that you can find yourself in the district trying to settle a dispute with neighboring business owners. It is an exciting job to be sure!
One of the challenges PBID Manager addresses is helping Executive Directors and their staff really see how much they are helping their district.
Here is 1 way to help you quantify what you and your staff are doing: Property Reports in PBID Manager.
Using the “Property Reports” feature in PBID Manager will help you and your staff track what kind of calls/requests you are receiving on a day to day basis. Whether the requests come into your office via a phone call, or the requests comes from a property owner you meet at meeting, now there is an easy way to track these requests in real time.
In this post, I am going to show you how to create a “Property Report”, and how to view all the Reports that have been entered into your PBID Manger System.
There are two ways to create a “Property Report”
The first way is when you are in the “Properties” Section of the PBID Manager.
 Simply select a Property in your district. Then on the right hand side of the page, all the details regarding that particular Property are displayed. Select the “Reports” tab. In the screenshot below, we are using property address 6331 Watt Avenue as an example. By using this method of entry, the Property Address automatically populates for you in the address field.
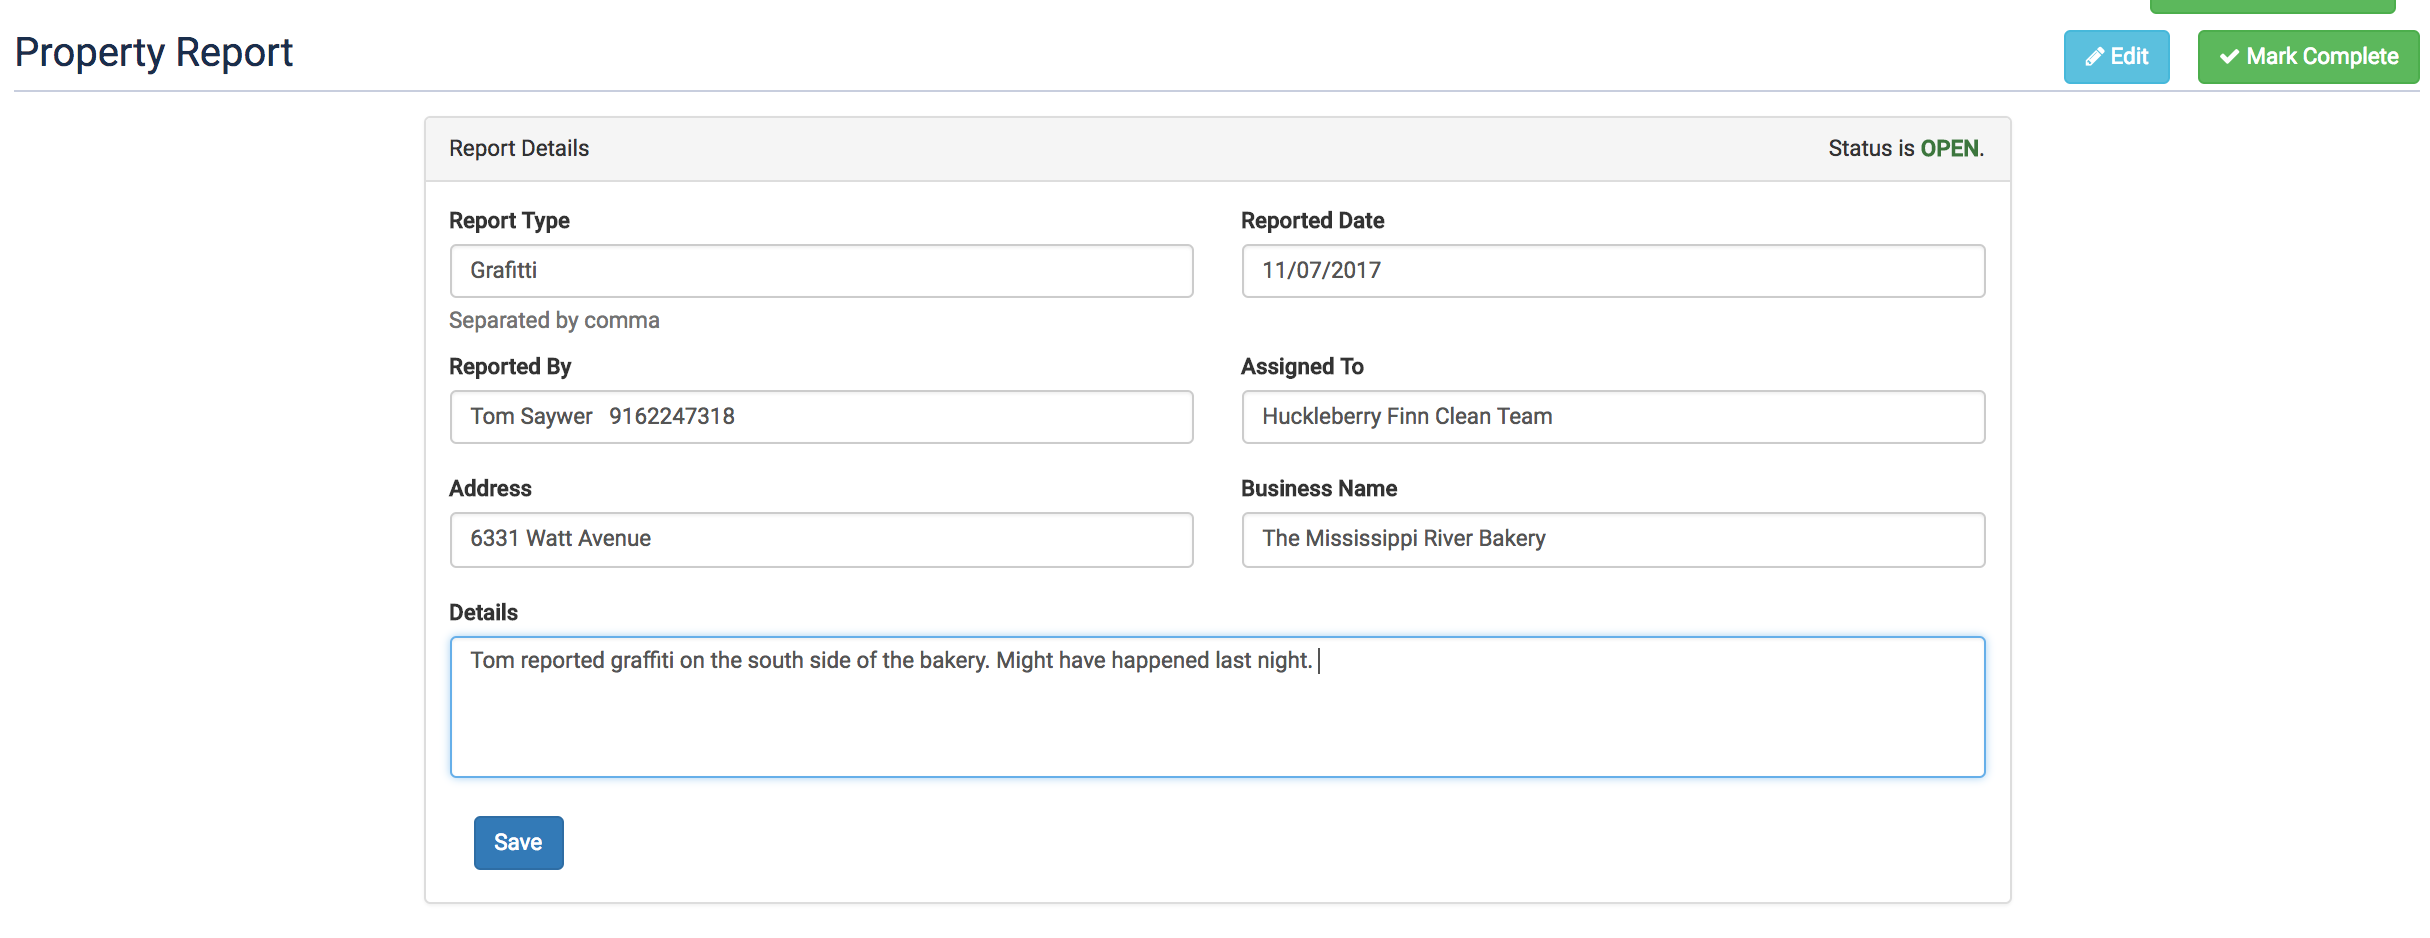
Here you can note what type of Request/Call you are receiving for this Property. You can log who called and who the request was assigned to. In this section, you can also upload photos if you wanted to by simply dragging the photo from your computer into the gray box at the bottom of the Property Report form. Because the “Property Reports” are created by address, there here is also a section to add a “Business Name” if the business owner is calling in an issue for this property address. If there any additional notes, you can add it in the report “Details” field.
Once you have filled out all the information you have, click on the SAVE button at the bottom left of the form.

The second way to create a Property Report is through the “Report” tab on the Sidebar menu
Simply select “Reports” on the sidebar menu and it will bring you to all the reports that have been submitted. Then on the top right select “File New Report”. Using this method, you will have to enter at least the first two numbers of the address, then the program will drop down a list of properties for you to select from . Once you have selected the correct property, you can proceed to fill out the form the same way as above.
Here is the example form all filled out.
 This next screenshot below now shows that particular report along with all of the other Property Reports that have been submitted by various office staff.
 All these Property Reports can be exported out of the PBID Manager into an excel file for you to use. Here’s how:
- Simply go to “Tools” .
- Then go to “Export Data”
- Scroll though until you find “Property Reports”
- You can now download a PDF or an Excel file of the Property Report.
Keep track of this for 30 days. You will see what areas are doing great, and what areas need a bit more of your attention. You can now show your Board that you are taking care of business.
 Simply select a Property in your district. Then on the right hand side of the page, all the details regarding that particular Property are displayed. Select the “Reports” tab. In the screenshot below, we are using property address 6331 Watt Avenue as an example. By using this method of entry, the Property Address automatically populates for you in the address field.
Here you can note what type of Request/Call you are receiving for this Property. You can log who called and who the request was assigned to. In this section, you can also upload photos if you wanted to by simply dragging the photo from your computer into the gray box at the bottom of the Property Report form. Because the “Property Reports” are created by address, there here is also a section to add a “Business Name” if the business owner is calling in an issue for this property address. If there any additional notes, you can add it in the report “Details” field.
Once you have filled out all the information you have, click on the SAVE button at the bottom left of the form.

 This next screenshot below now shows that particular report along with all of the other Property Reports that have been submitted by various office staff.
 All these Property Reports can be exported out of the PBID Manager into an excel file for you to use. Here’s how:
